

Stop, Lego time
July 28th, 2020 (by Steve)
Lego has been a mutual love of ours throughout our relationship. From a Lego-themed wedding programme, to the opening credits of the videos documenting our motorhome trip around Europe, to the Lego calendar that we’ve added our family to. But never have we dedicated quite so much of our time to playing with Lego as we have been during lockdown.
We’ve already written a brief blog post for the Gloucester Diocese site (the title wasn’t chosen by us!) about how we got into making short Lego stop-motion animation videos of bible stories and you can watch all of our videos on our YouTube channel:
Several people have asked us how we make the videos though, so here’s a bit of a behind the scenes look at the end to end process.
1. Choose the bible passage and script it
Our starting point is the lectionary. What’s a lectionary? It’s a centrally-curated suggested list of bible readings for particular dates. Our current church chooses to follow the lectionary on a Sunday, which for each week gives a reading from the Old Testament, a psalm, a gospel reading and then a reading from elsewhere in the New Testament. Once we’ve chosen which one we’re going to animate, Kiri distils the passage down to capture the essence of the message. This involves a whole wealth of complexity, including reading multiple translations, looking up what other people have said about the passage, working out the simplest way to convey that message, quite often a debate over the wording… and a lot of prayer!
2. Identifying new Lego to buy
Depending on the passage, there may be parts of it that we can’t easily represent with our current Lego. For example, trawling eBay for job lots of minifigures for big crowds, buying foliage for the parable of the sower and buying fish for the Kingdom of God being like a huge catch of fish. The rest of the time we improvise with what we’ve got. It’s always touch and go as to whether the Lego will arrive in time for the filming, but to date it’s worked out OK for us.
3. Building the sets and the characters
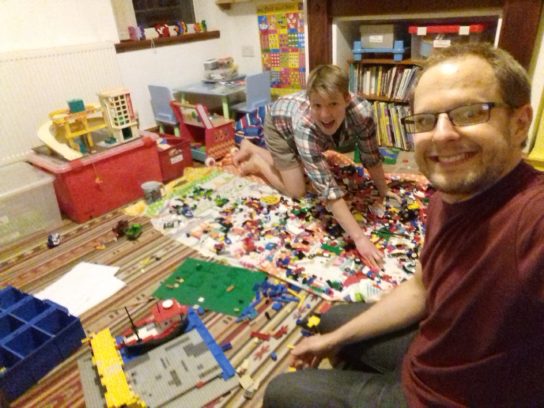
It’s fair to say that the sets have been getting ever more elaborate as we’ve progressed with the videos. It’s not been a deliberate decision; we’ve just got a bit too engrossed! Where possible we’ll try to re-purpose one set for multiple scenes, but in fairness as the building of the sets is so fun, we don’t really mind building multiple sets (although we often have to dismantle part of one set to have enough pieces for another). This is one part of the process that we can do with the children around; Lego spread across the living room floor and all of us on our hands and knees playing together. And sometimes we spend disproportionate lengths of time building bits that only feature for a few seconds (you don’t want to know how long it took to build the tractor!)
4. Recording the script and editing the audio
Once we’ve got the script, we record the audio with our eldest. Several people have asked how a pre-schooler can remember all of the lines like that. We’ll share a secret; it’s not done from memory. We set up a laptop with a USB microphone and Audacity. I then break down the script into short chunks (sometimes even sub-sentence chunks), reading out each section in turn, which are then parroted back. We do it all in one take (although occasionally repeat a line or two) as it’s unfair to ask a child of that age to record multiple takes. Once recorded, I edit the audio in Audacity; removing my voice, trying to make sentences seamless and smoothing out the volume that we get from being different distances away from the microphone.
5. Setting up the “studio”

We don’t have a dedicated place in our house where we can shoot the footage. Our first video was shot in our eldest’s bedroom, on the bed with the white wall behind and natural lighting from the side. However, as you’ll see from the final footage, the set moved around a fair amount; not very ideal. After that, we moved the “studio” to the kitchen, twisting the ceiling lighting to point at the kitchen table, putting a white bedsheet over a couple of taller toys (to give a white background), and weighting down the set board with a large bag of popcorn, a heavy candle or some tins of food to stop movement. For our latest film we’ve invested in an angle-poise lamp with a daylight bulb to give us a bit more control over lighting, plus it means when I’m doing the washing up, I can actually see what I’m doing as the kitchen lights are now pointing in more sensible directions.
6. Setting up the camera
Some people love the techy details. So, we use a Nikon D5100 camera with a 18-200mm lens on a tripod with an infrared remote release so we don’t have to touch the camera to get the shot. For the majority of our shots we want a fairly large depth of field (so that most things in the shot are in focus), so we set it to aperture priority with aperture somewhere between f/14 and f/32. Once we’ve set the focal point for the sequence, we’ll make sure that the focus is set to manual so that we don’t get any variation of what is in focus.
7. Shooting the footage

The bulk of our time is spent shooting the individual frames that will be stitched together. Each of our videos is made up of between 600 and 800 shots, that we then stitch together at 6 frames per second. Now if we were doing this properly, we would take the recording of the script and work out exactly how many frames we’d need per scene. We’d also probably synchronise how we animate particular things – for example when Kiri films someone walking she’ll move the arms too (attention to detail), whereas I focus more on as an accurate a portrayal of leg movement as I can (it’s incredibly frustrating when I forget which leg I’ve just moved!). With multiple people in a scene, we should also probably document the path and movement for each character, but instead we just wing it.
You’ll notice that there are two styles of scene we’ve employed; the 3D standard scene, then what we refer to as “grey board” scenes, where we shoot with the camera directly above a grey board and shoot in 2D.
Our most complicated scenes to film so far have been:
- Flocks of sheep – as we didn’t stick them down onto the board, we found that when they’re close together, if you knock one sheep over, the rest will fall like dominoes!
- Jerusalem street scene – we had so many different characters doing different things that it was tough to keep track of what everyone was doing. We worked on this scene together, with Kiri moving some characters and me moving the others
- The docks – rocking a boat, moving people, having fish “flying” through the air – there was a lot going on to try to co-ordinate
- Everyone going into heaven – working out a path for every character to take as they were funnelled in through a gate, and then getting them to follow that path, whilst avoiding other people was quite a challenge
With scenes like these, it can take upwards of 30 seconds to move everything for each frame, whereas for simpler scenes with just one character moving, it’s more like 10 seconds per frame.
And we must give a shout-out to blu-tac – with particularly tricky things that people are holding, or balancing on, we use a strategic bit of blu-tac to hold it in place. If you freeze a few of the frames, you might be able to spot a bit still!
8. Bringing it all together
By this stage we’ve got several hundred frames and an audio file and what happens next is fully in Kiri’s realm; with her degree in graphic design (majoring in moving image), she works her magic. She uses the DaVinci Resolve video editing software (version 15, as our computer can’t handle version 16) to import the frames and choose the frame rate, add transition effects and synchronise the audio. It’s at this point that she’ll come to me and say “I need a sheep sound” or “I need a woohoo”, so I’ll dutifully record the sound effect (normally on my phone). Once these are incorporated and a title has been added, it’s time to render the film, which we then upload to YouTube.
To start with, our plan was to record one of these every week during lockdown, but as the whole process is fairly time-consuming, we found that we were working on the Lego films most evenings. Don’t get me wrong; we’re happy to spend date night drinking beer and playing with Lego (either building sets or moving characters tiny amounts). We thrive on being creative together, but every night was a bit too much! We then moved to once a fortnight… which worked when our eldest was spending some time at pre-school, but now we’re in the summer holidays, we might reduce it to once every 3 weeks.

We’ve had several people asking us whether they can use these films at holiday clubs, in services, in assemblies etc. The answer will always be “yes!” – we made these to be used and shared. And if you want to be notified of when there’s a new film, you can subscribe to our YouTube channel.
When will we stop making these films? Who knows!
Posted in Life | 4 Comments »